A Comprehensive Guide to Connecting Flexible Conduit to Electrical Boxes
A Comprehensive Guide to Connecting Flexible Conduit to Electrical Boxes
May 16, 2025
Flexible conduit is a versatile solution that combines protection and adaptability for wiring. Unlike rigid alternatives, it bends effortlessly around tight corners, irregular spaces, or dynamic environments, making it ideal for residential, commercial, and industrial setups. Whether you’re securing wires in a basement, office, or factory, proper installation—especially connecting conduit to electrical boxes—is critical for safety, code compliance, and long-term performance.
Types of Flexible Conduit
The first step is selecting the appropriate conduit for your environment:
Liquid-Tight Flexible Metal Conduit (LFMC) Built with a durable metal core and moisture-resistant PVC jacket, LFMC is designed for outdoor or damp areas like HVAC systems or exterior lighting. Its waterproof seal protects wires from rain, splashes, and corrosion.
Metallic Flexible Conduit (FMC) Also known as “Greenfield,” FMC features interlocked metal strips, offering robust mechanical protection for indoor industrial/commercial use (e.g., equipment rooms). It grounds naturally when paired with metal boxes.
Non-Metallic Flexible Conduit (NMFC) Lightweight and corrosion-resistant, NMFC (often PVC corrugated conduit or ENT) is perfect for dry residential settings. It’s easy to cut and install but requires extra protection in exposed areas.
Essential Tools and Materials
1. Electrical Boxes: Match to Your Needs
Junction Boxes: Large, multipurpose boxes for complex wire connections in walls or ceilings.
Outlet Boxes: Smaller boxes for outlets, switches, or fixtures in homes and offices.
Weatherproof Boxes: Sealed for outdoor use, paired with LFMC for pool systems, outdoor lighting, or industrial washdown areas.
Material Choice:
Metal Boxes: Durable, heat-resistant, and conductive (ideal for grounding in commercial/industrial setups).
Plastic Boxes: Lightweight and non-conductive (cost-effective for residential use, but require separate grounding with metal conduit).
2. Conduit Connectors: Secure the Link
Straight Connectors: For direct, no-bend installations.
90-Degree Connectors: Navigate tight corners without straining wires.
Strain Relief Connectors: Prevent 导管 (conduit) from pulling out in high-vibration areas.
Liquid-Tight Connectors: Rubber-sealed for waterproofing in outdoor applications.
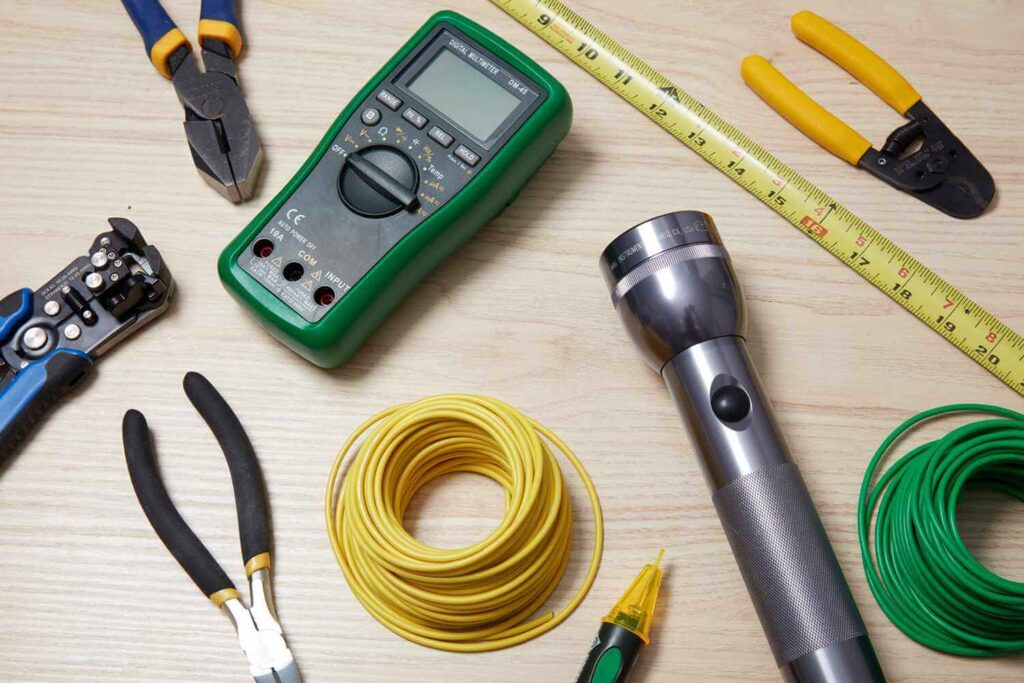
3. Tools and Hardware
Cutting & Stripping: Conduit cutters (for clean cuts), wire strippers, and a utility knife.
Installation: Screwdrivers (insulated handles), drill with hole saws, and a tape measure.
Security: Stainless steel screws, locknuts (for metal systems), and bushings to protect wires from sharp edges.
Step-by-Step Installation Guide
1. Measure and Cut the Conduit
Accurate Measurement: Measure along the routing path, including bends, and add 2–3 inches of slack for movement. Maintain a bend radius of at least 3x the conduit diameter (e.g., 3 inches for 1-inch conduit).
Clean Cutting: Use a conduit cutter or fine-toothed saw for plastic/NMFC; a hacksaw for metal conduit. Deburr edges with a file to prevent wire damage.
2. Prepare the Electrical Box
Knockout Selection: Choose a knockout matching the conduit diameter. Remove it and clean the box interior to eliminate dust or debris.
Seal Check: For weatherproof boxes, ensure knockouts are intact and add rubber gaskets if needed.
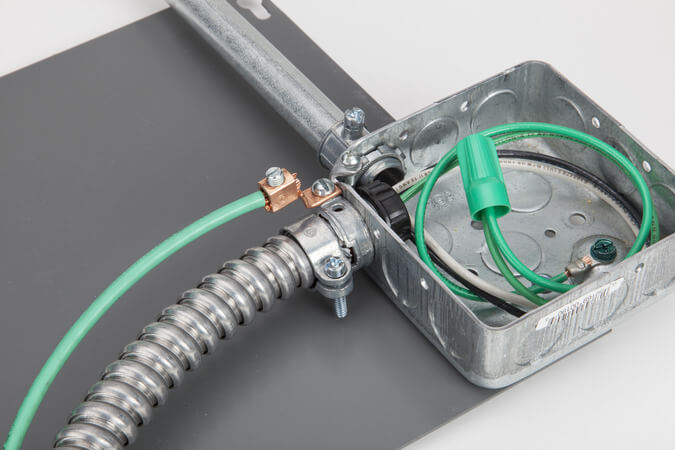
3. Connect Conduit to the Box
Align and Attach: Slide the conduit into the connector (e.g., straight or 90-degree) until snug. For metal systems, secure the connector with a locknut inside the box and a screw outside.
Strain Relief: Tighten strain relief connectors in high-movement areas to prevent dislodging.
Waterproof Seal: In wet environments, ensure liquid-tight connectors’ rubber seals are fully seated against the box.
4. Wire Management
Strip and Connect: Strip 1–2 inches of insulation from wire ends and attach them to terminals inside the box, leaving 6 inches of slack for repairs.
Grounding: Bond metal conduit and boxes to the grounding terminal. For plastic boxes with metal conduit, use a separate grounding wire.
5. Final Checks and Testing
Tightness Check: Ensure all screws, nuts, and connectors are secure.
Function Test: Power up the system to check for shorts, overheating, or tripped breakers.
Code Compliance: Verify the installation meets local codes (e.g., NEC in the U.S.) for safety and legal compliance.
Pro Tips for Success
Environment Matters: Never use NMFC in damp areas; opt for LFMC instead.
Plan for Expansion: Leave extra conduit length if future wiring changes are possible.
Annual Inspections: Regularly check connections in high-vibration or humid environments to prevent looseness or corrosion.
By following these steps, you’ll create a secure, code-compliant connection that protects your wiring and ensures your electrical system performs reliably for years. Whether you’re a DIY enthusiast or a professional electrician, precision in installation is key to safety and efficiency.